अब आफ्नै कम्प्युटरबाट सिधै नेपाली अक्षरमा लेखौं बिना इन्टरनेट
आज मैले केवल तपाइंको लागी एउटा सजिलोसंग नेपालीमा लेख्न मिल्ने सफ्टवेर लिएर आएको छु अबश्य प्रयोग गरेर हेर्नुहोला यो सफ्टवेर प्रयोग गरिसकेपछी फेसबुक अनि याहू जस्ता हरेक साइटहरुमा सिधै च्याट गर्न सकिने अनि आफ्नो कम्प्युटरमा पनि लेख्न सकिने
अब नगरौं झन्झट unicode रोमनबाट नेपालीमा लेख्नको लागी साइटहरु खोज्न यो सफ्टवेर प्रयोग गरेर बिना internet कुनै पनि बेला लेख्न सकिने शुरु गरौँ कसरी बनाउने नेपालीमा लेख्नको लागी तल हेरौं
१. सबैभन्दा पहिला तपाइं यो लिंकमा गएर भाषा चयन गर्नुस मतलब त्यहाँ Nepali लेखेको कोठाभित्र Mark लगाउनुस र अब तल “I agree the google tearms of service and privacy policy” मा Tick लागाएर डाउनलोड गर्नुहोस
२. डाउनलोड successfull भैसकेपछी कम्प्युटरमा गएर त्यो सफ्टवेर लाई अनिबार्य scan गरौँ र त्यो सफ्टवेरलाई अब right click गरि “Run as administrator” मा क्लिक गरौँ

३. अब केहि समय पर्खिनुहोला उदाहरणको लागी तलको चित्र हेरौं

४. अब केहि समय पछी नया pop up फाइल खोलिनेछ र त्यहाँ तल हेरौं जस्तै “I accept the term of use in ‘End User License Agriment’ (A)” मा ठिक लगाइदिउ अनि (next) बटनमा थिच्नुहोस

५. अब केहि समय पर्खौं अनि तल (finish) बटन दबाउँ

६. तपाइंको कम्प्युटरमा नेपाली भाषा त successful भयो तर अब लेखनलाई सजिलोको लागी “Shortcut keyboard key” बनाउन जरुरी छ त्यसैले तलको नियम पालन गर्न आग्रह गर्दछु
७. सबैभन्दा पहिला “Control Panel”हुँदै “Region and langues” मा क्लिक गर्नुहोस र “Keyboards and languages” मा क्लिक गरी “Change keyboards…” मा (click) गर्नुहोला
 ८. अब “Advanced key Settings…” मा क्लिक गर्नुहोस र तल पुछारमा हेर्नुहोस “Change key sequence…” मा क्लिक गरि नया pop up window खोल्नुहोस

९. अब त्यहाँ खुलेको window मा केहि “Shortcut key” हरु दिएको छ तपाईं लाई सजिलोको लागी दुइ ओटा मतलब दायाँ र बायाँ shortcut key मा ठिक लगाएर तल ok बटनमा थिच्नुहोस अनि सबै windows files close गर्नुहोस

१० अब चाही तपाइंले नेपालीमा लेख्नको लागी “Google nepali input” तयार भयो र लेख्ने तरिका तल हेर्नुहोस

११. Now you are absolutely successfull for downloading and settings google nepali input writing language
यदी तपाईं अंग्रेजी रोमन बाट नेपाली Unicode मा अनलाइन मार्फत लेखना चाहनुहुन्छ भने यहाँThank you.
Show file लाई लुकाउनुहोस
तपाइंलाई थाहा नै हुँदैन की कुन बेला आँफै बन्छ यो Desktop.Ini File र कहाँ-कहाँ बनेर बसेको छ त्यो पनि थाहा छैन हैरानै पार्यो अब त Programs Folder भित्र अरु आबश्यक File हरु भन्दा बढी Desktop.Ini नै बढी देखिन पो थाल्यो र कती चोटी कती दिन तपाईं यसलाई Delete गरीराख्नुहुन्छ र त्यसै पनि तपाइंले त्यसलाई Delete नै गरेर पन्छाउने गर्नु भएको छ भने म तपाइंलाई केहि पनि भन्दिन तर तपाइंले चाहेमा यस्ता अनाबश्यक File लाई सधैंको लागी लुकाएर रोक्न सक्नुहुन्छ आउनुस कसरी हटाउने सधैंको लागी यस्ता Desktop.Ini लाई…

१. सबैभन्दा पहिला तपाईं Windows Explorer मा जानुस मतलब Computer मा भएको कुनै एक Music, Video को Folder खोल्नुस र त्यसपछी अब त्यहाँ Computer को Keyboard बाट “ALT” key दबाउनुहोस तपाइंले ALT key दबाएपछी अब त्यहाँ सबैभन्दा माथी Menu मा हेर्नुस “Tppls” लेखेको देख्नुहुनेछ त्यसमा Click गरेर तल “Folder Options…” मा Click गर्नुहोस

२. त्यसपछी अब त्यहाँ Folder Options को एउटा Popup window खुल्नेछ र त्यस Windows को माथी “View” मा Click गर्नुहोस तपाइंले View मा Click गरीसकेपछी अब तल Mouse Scroll गरेर “Hide protected operating system files (recommended) कहाँ छ खोज्नुहोस र फेला परेसी ठिक त्यसमा Mark लगाउनुहोस र तल “Apply” Button थिची “Ok” गर्नुहोस

Computer को गती शुस्त (Slow) हुनुको कारण Fast गराउने पाँच उपाय
मैले तपाइंलाई यो भन्न खोजेको होइन की तपाईंको Computer को RAM (Memory) 128, 512, MB अथवा 1 GB को छ तर पनि 3, 4 GB को जत्तिकै Fast बनाउनुस भनेर यदी त्यसो हुन थाल्यो भने महंगा महंगा रुपैयाँ तिरेर Good Quality को किन्नु के नै अर्थ रह्यो र हैन तर महंगा पैसा तिरेर राम्रो Intel Core I3, I5, I7 ले पनि घमण्ड नगर्नुहोला कि मेरो Computer त कहिले नि Slow चल्दैन भनेर एउटा कुरा सधैं ध्यान मा राख्नुस मानिसको मृत्यु हुनको लागी उसलाई बुढेसकाल कुरीराख्नु पर्दैन यदी उसले आफ्नो बालकपन अथवा जवानीमा शरीरको ख्याल राखेन भने कालले बोलाउनु
भन्दा पहिले नै दुनिया छोड्नुपर्छ हो त्यस्तै तपाईंले पनि आफ्नो Computer को पहिले देखि हेरचाह नगरे त्यसलाई बोकेर कहाँ छ सस्तो Computer बनाउने दोकान भनेर गल्ली-गल्ली छिर्नु पर्ने हुन्छ त्यसैले आउनुस म यदी हजुरको Computer पहिलाको भन्दा दैनिकी गती कम्ती हुँदै गएको छ भने त्यसलाई फेरी कसरी तिब्र गतीमा (Fast Speed) मा ल्याउने केहि तरीका हरु तल पढेर अपनाउनुहोस
१. तपाइंले Internet भ्रमण गर्दा सधैं एउटा कुरामा ध्यान गर्नुहोला हो तपाईं हामी यस्तै Internet मा खेल्दै-खेल्दै जाँदा कस्तो-कस्तो Site मा पुग्यौं त्यो आँफैलाई पनि थाहा हुँदैन र त्यस्तै कुनै एक Site मा आफ्नो Computer को बारेमा एक अती मिठो भाबनाले लेखेको पढ्नुभयो र त्यसको अन्त्यमा For Download file please click here…भनेर लेखेको देख्नुभयो र तपाइंले पनि बिचारी नगरी त्यसलाई हत्तपत्त माथी लेखेको आधारमा Download गर्नु भयो र छिटो-छिटो त्यसलाई
Computer मा Install गरेर Run पनि गरीसक्नुभायो तर तपाइंले त्यस Software Download गर्नुभन्दा पहिला सोच्नुभेना की त्यो Software कहिले Internet मा Update गरेको थियो किनकी यस्ता कयौं Software हरु हुन्छन
सालौं पहिले नै Update गरेको र त्यसका New Version हरु नै उपलब्ध नभएको त्यस्ता Software अन्जानमा Download गर्दा Computer मा Virus ले आक्रमण गर्न सक्छ Antivirus छ भने त त्यसले Block गर्छ नभए के गर्ने त्यै पनि तपाइंलाई
थाहा नै छैन होला आफ्नो Computer को Antivirus ले काम गरेको छ की छैन भनेर त्यसमा अझै Free को Antivirus हुनुपर्छ ठिक छ तपाइंले Software Download त गर्नुभयो र के तपाइंले त्यसलाई Computer मा Install गर्नुभन्दा पहिला राम्रो संग Antivirus ले Scan गर्नु भयो बिलकुल गर्नुभएन शाहेद हजुरलाई थाहा थिएँ या थाहा भएर पनि
बिर्सेर Install गरिसकेपछी जिब्रो तोकेर तालुमा हात राख्नु भयो सधैं ध्यान दिनुहोला तपाइंले साथी अथवा जो कसैको Device Pendrive आफ्नो Computer मा Install गरीसकेपछी सिधै त्यसलाई नखोली पहिला Full Scan गर्नु जरुरी छ यो नसोच्नु की यो साथीको Pendrive अस्ती घुसाउँदा त केहि पनि भएको थिएन भनेर र कुनै पनि Software Download गरीसकेपछी Install गर्नुभन्दा पहिला त्यसलाई Scan गर्नुहोला
२. तपाईं हामीले आफुलाई नचाहिने File Programs हरु Delete त गरेका हुन्छौं तर त्यो File Windows बाट पुरा रुपले नाती त्यो Recycle Bin मा गएर बसेको हुन्छ त्यसलाई सधैं हर समय खाली राख्नु जरुरी छ

अनि के तपाइंलाई Disk CleanUp को बारेमा थाहा छ अथवा सुन्नु नै भएको छैन अथवा थाहा भएर पनि Disk CleanUp गर्न लाई अल्छी गर्नुहुन्छ तपाइंले समय समय मा Disk Clean Up गरीराख्नु अत्यन्त जरुरी छ त्यसो गर्नाले Internet Temporary Files Computer मा रहेका Temporary Files जस्ता अनेकौं अनाबश्यक File हरु हटाइदिन्छ

३. के तपाइंलाई Windows Defender को बारेमा थाहा छ त्यो तपाईंको Control Panel मा नै बसेको हुन्छ त्यो पनि एक Antivirus नै नै हो जसले Internet बाट आउने Virus लगाएत अन्य Computer मा रहेका Virus लाई रोक्ने मद्दत गर्दछ त्यसलाई नियमीत Scan गरीराख्नुहोला Windows Defender खोल्दा खेरी सधैं यहाँ तलको चित्र जस्तो ठिक चिन्ह देखिनु पर्छ यदी तपाइंले Windows Defender लाई नियमीत Update अथवा Scan गरीराख्नु भएन भने त्यसको कारणले Computer मा नराम्रो नोक्सानी पुर्याउन सक्छ र Speed पनि कम्ती हुदै जान्छ
यदी तपाईंको Windows Defender यहाँ तलको जस्तो चित्र देखियो भने Windows Defender Update And Scan गर्नुहोस
४. धेरै साथीहरु सजिलो को लागी Desktop मा Shortcut File बनाएर राख्छन त्यसको कारणले पनि Computer Speed कमी हुँदै जान्छ यदी हजुरले
पनि त्यसो गर्नु भएको छ भने त्यो तरीका ठिक होइन र हामीले Computer खोल्नासाथ एउटा File अर्को Folder र अर्को Folder को झन अर्को Folder मा दैनिकी बदली रहह्न्छौँ यसो गर्नु ठिक होइन किनकी
यसो गर्नाले Computer मा अनाबश्यक File हरु आँफै बनिदिन्छ जुन त्यस्ता File हरु तपाइंले सजिलो संग देख्न सक्नुहुन्न र Computer को Memoryघट्दै जान्छ अनि आफुलाई आबश्यक भन्दा बढी Sofwate Compter मा Install गरेर नराखौं यस्ता
धेरै साथेहरु हुन्छन Software Install गरेर त्यत्तिकै राख्छन जहाँ त्यसको कामै छैन र त्यस्ता Software तुरुन्त हटाईहाल्नुहोस Control panel / Add or remove मा गएर अनि Desktop बाट पनि त्यसको File हटाउनुहोस त्यस्ता Fileहरु Desktop मा अरु पनि छ भने हटाउनुहोस र तपाईं हामीले कुनै पनि Music Video photo अथवा Software Documents चाहे जे सुकै पनि Download अथवा Save गर्दा Local Disk (C:) मा गएर बसेको हुन्छ त्यसले गर्दा Computer को RAM घट्दै जान्छ र Computer Slow हुन पुग्छ त्यसैले यस्ता File हरु Save अथवा Download गर्दा Local Disk (D:) अथवा अरु कुनै Drive मा Save गर्नुहोला
५. अब म हजुरलाई Disk Defragmenter को बारेमा चर्चा गर्छु यो Disk Defragmenter पनि हजुरले हरेक हप्ता मा एक वा एक भन्दा बढी जती सक्दो धेरै चोटी गरीरख्दा आफ्नो Computer ताजा स्वस्थ रहिरहन्छ र Speed पनि बढी रहन्छ अनिबार्य गर्नुहोला र आउनुस कसरी गर्ने त Disk Defragmenter
सबैभन्दा पहिला “Start” Button मा Click गरेर “Disk Defragmenter” Type गरी त्यसलाई खोल्नुहोस अथवा “Win Logo+R” लाई एकैसाथ थिचेर त्यहाँ खुलेको Box मा यो “dfrg.msc” Type गरेर “Ok” गर्नुहोस र अब त्यहाँ खुलेको Box मा Computer मा रहेको Drive हरुको नाम देखिएको हुन्छ र हजुरले “Local Disk (D:) मा Click गरेर तल “Defragment disk” मा Click गर्नुहोस
त्यसपछी Automatic त्यहाँ काम शुरु हुन थाल्छ र जब त्यहाँ काम शिध्दिएपछी त्यहाँ तपाइंलाई Computer Restart गर्ने की नगर्ने भनेर सोध्छ तपाइंले Computer Restart गर्नुहोस र यदी अर्को Drive पनि Disk Defragmenter गर्न चाहनुहुन्छ भने यहाँ माथी भने झैं गर्नुहोला
के तपाइंलाई यो तरीका मन पर्यो अथवा अरु पनि जानकारी लिन चाहनुहुन्छ भने तल Comment Box मा लेख्नुहोला धन्यबाद |
Video तथा MP3 कसरी काट्ने Real Player को सहाएताले
तपाईं हामीले Video अथवा MP3 Cut गर्नु पर्यो भने Video Cutter अनि MP3 Cutter छुट्टा-छुटै को Software खोज्छौं त्र म हजुरलाई एउटै Software बाट २ काम गर्न मिल्ने Real Player को माध्यमबाट त्यसैले आउनुस आज म हजुरलाई एक सजिलो तरीका बाट Video अनि MP3 काट्न सिकाउँछु यदी तपाईं ५ मिनेट को video लाई काटेर कम्ती गर्ने अथवा Video को नचाहिने Scene हरु लाई काट्ने र Mp3 पनि सजिलै संग काट्न सकिने यदी तपाईं लाई Video तथा MP3 को अगाडी पछाडी को भाग कहाँको काट्न परेको छ Real Player बाट काट्न सकिन्छ
त्यसको लागी तपाईंको Computer मा Real Player हुन जरुरी छ यदी हजुर संग Real Player छैन भने यो तलको लिंकमा गएर Download गर्नुहोस
Download…
Download गरेर Install गरीसकेसी अब तल हेर्नुहोस कसरी काट्ने Video तथा MP3
१. सबैभन्दा पहिला त म हजुरलाई Video काट्न सिकाउँछु त्यसको लागी तपाइंले कुन Video काट्न खोजेको हो त्यस Video लाई Real Player मा Play गराउनुहोस
२. त्यसपछी Video Play भैसकेसी यदी हजुर चाहनुहुन्छ भने Push गर्न पनि सक्नुहुन्छ अथवा नगरे पनि हुन्छ त्यसपछी अब Mouse Pointer लाई ठिक Video को बिचमा लगेर राखी हेर्नुस Video भन्दा ठिक तल तपाइंले एउटा कैंची जस्तो चित्र अनि साथमा “Trim” लेखेको देख्नुहुनेछ त्यसमा Click गर्नुस

३. त्यसपछी अब त्यहाँ अर्को छुट्टै एउटा Windows खुल्नेछ र अब तपाइंले त्यहाँ त्यस Video लाई Play गर्नुस अब त्यहाँ ध्यान दिनुहोला तपाइंले Video कती समय भन्दा अगाडीको काट्ने हो त्यति नै समय Play भैसी Video लाई Push गर्नुस र अब Mouse Pointer लाई Video भन्दा तल Black Tab भएको ठाउँमा लगेर हेर्नुस त्यहाँ Left Side मा हजुरले “Set Start” भनेर लेखेको देख्नुहुनेछ त्यसमा Click गर्नुहोस

४. त्यसपछी अब फेरी Video लाई Play गर्नुस यदी छिटो गर्न चाहनुहुन्छ भने Mouse pointer लाई Clip Position मा लगेर खिच्न पनि सक्नुहुन्छ Video लाई Play गर्दै जाँदा कती समय भन्दा पछाडीको काट्ने हो ठिक त्यहाँ Push गर्नुस र Mouse लाई ठिक माथी Black tab मा लैजानुस त्यहाँ Set end देख्नुहुनेछ त्यसमा Click गरेर तल “Save Trim…” मा Click गर्नुहोस यदी हजुरले अगाडीको भाग मात्रै काट्न पर्ने छ भने यहाँ माथी ३ नं: मा भने झैं गरी सिधै तल “Save Trim…” मा Click गरेर Save गर्न सक्नुहुन्छ

त्यसपछी File को नाम दिएर “Save” Button थिच्नुहोस Video Save हुन थाल्छ
अब तपाईं MP3 काट्न चाहनुहुन्छ भने MP3 लाई पनि Real Player मा Open गर्नुहोस र यहाँ माथी २ नं: मा भने झैं गरी “Trim” मा Click गर्नुहोस र त्यहाँ एउटा छुट्टै सानो Windows खुल्नेछ अब त्यहाँ Mouse लाई Clip Poaition मा लगेर कती काट्ने र कती राख्ने समय मिलाउनुस जस्तै यहाँ तल हेर्नुस सेतो धारको ले कसरी तानेर समय 1:16 Second मा राखेको छ त्यसै गरी पछाडी बाट पनि काट्न पर्यो भने त्यसरी नै Clip position मा खिचेर Time Set गर्नुहोस र तल “Save Trim” मा Click गरी File Save गर्नुहोस

यो थियो तपाईंको लागी एउटा सानो Media Cutter साहेद हजुर लाई यो तरीका अपनाउं कुनै अप्ठेरो परेन होला हैन कि कसो हस त तपैनारु Post मा पनि Click गरेर अन्य Article पनि हेर्नुहोला धन्यबाद |
मान्छेले लगाएको कुनै पनि कपडाको रंग (Color) कसरी बदल्ने
copy right
आज मैले हजुरलाई Photoshop को सहाएताले मान्छेले लगाएको कुनै पनि कपडाको रंग (Color) कसरी बदल्ने भनेर चर्चा गर्न जाँदै छु तर याद गर्नुहोला मैले यहाँ तल कपडाको Color change गर्ने भन्ने बारेमा लेख्न खोजेको हुँ कपडा बदल्ने (Change) गर्ने भन्न खोजेको होइन कपडा पनि बदल्न सकिन्छ तर त्यसको बारेमा भने आगामी दिनहरुमा बयान गरौंला र अब हेर्नुहोस यहाँ तल कसरी बदल्ने त कपडाको Color एकदमै सजिलो अनि छिटो तरीका >>>
१. सबैभन्दा पहिला Photoshop खोल्नुहोस र कुन मान्छेले लगाएको कपडाको रंग बदल्न खोजेको हो त्यस फोटोलाई Select गर्नुहोस त्यसको लागी तपाइंले Keyboard बाट “Ctrl+O” थिच्दा पनि हुन्छ

२. त्यसपछी अब “Lasso Tool (L) अथवा Pen Tool (P)” कुनै एक मा Click गर्नुहोस

३. र अब त्यस फोटोलाई Zoom गर्नुहोस र Zoom गरंको लागी keyboard बाट “Ctrl++ (plus) अथवा Ctrl+- (minus) थिचेर Photo लाई Zomm गरी कपडाको सबैतिर बाट घेरा लगाउनुहोस घेरा लगाउँदा खेरी बराबर लगाउनुहोला र यदी हजुरले घेरा लगाउने बेलामा Lasso Tool (p) प्रयोग गर्नुभयो भने र Photo लाई यताउता तलमाथी हलाउनुपर्यो भने Keyboard बाट Space bar थिच्नुहोला र “Pen Tool (P) ले गर्नुबह्यो भने चाहीं Scrol bar लाई नै एताउता तलमाथी गर्दा हुन्छ र घेरा लगाएर अन्तीम भैसकेपछी Keyboard बाट “Enter” key थिच्नुहोला र त्यसपछी यहाँ तलको जस्तै देखिनेछ

४. र अब Photoshop को सबैभन्दा माथी “Layer >New Adjustment Layer > Black & White” मा Click गर्नुहोस

५. Black & White मा हजुरले Click गरीसकेपछी त्यहाँ अर्को एउटा New Layer को Dialog Box खुल्नेछ र हजुरले कतै अपनी केहि नगरी मात्र “Ok” गर्नुहोला

६. र अब त्यहाँ फेरी अर्को एउटा Box खुल्नेछ त्यो चाहीं हजुरले कपडाको Color बदल्ने Color Box हो तर हतार नगर्नुहोस सबैभन्दा पहिला त्यहाँ “Tint” Box मा ठिक लगाउनुहोस र ठिक त्यसको दायाँतिर White Color भएको ठाउँमा Click गर्नुहोस जस्तै तल हेर्नुहोस

७. र अब चाही हजुरले आफ्नो कपडाको Color कस्तो राख्ने तपाईं आफ्नै तरीकाले बनाउन सक्नुहुन्छ

Color कस्तो राख्ने हो आफुलाई मन परेको Color राखिसकेपछी Right side मा “Ok” button थिच्नुहोस
८. यदी त्यहाँ कपडाको कुनै भागमा Color लागेको छैन भने त्यसको लागी “Earcer Tool (E)” मा Click गरेर Color नलागेको भागमा Color लगाउनुहोस तर कपडामा सबै ठाउँमा अथवा तपाइंलाई चित्त बुझ्दो बनेको छ भने Brush ले मिलाई राख्नु पर्दैन

Color लगाउनेबेलामा Brush Size ठुलो अथवा Brush नमिलेको हुन सक्छ त्यसको लागी Phot मा Right Click गरी Brush को Size अनि Brush Icon बदल्न पनि सक्नुहुन्छ र अब Photo को Color Change गर्ने काम सकियो त्यस फोटोलाई Save गर्नुहोस

कस्तो लाग्यो हजुरलाई यो माथीको तरीका साहेद सजिलै लाग्यो होला यदी हजुरलाई Photoshop को बारेमा अन्य जानकारी चाहिएमा यहाँ तल Comment Box मा हजुरले लेख्नुहोला धन्यबाद |
बूटेबल PenDrive बनाएर विन्डोज अपरेटिङग सिस्टम ईन्स्टल गर्नुहोस्

How To remove One Operating System from Dual Boot Windws?
Removing a dual boot can be daneerous and it does not guarantee that windows will froget about the 2nd boot sector. Most of us install two operating system in the pc just like windows xp and window 7 to get entertained by both the ends and can use any of them one bye one. This adds ability to use any version but side by side adds some heavy burden on system and kills its performance.

How to remove one operating system from windows
1. Press Start Button and choose Run or cmd, you can also open Run Command by pressing Windows Key+R
2. Now in cmd or Run dialog just type (sysdm.cpl) and press enter, now system properties Dialog will open in front of you.
3. click on Advanced Tab and press Setting under Start up and Recovery option.
- Now under System startup Area Clic on Edit Button. if you have only one operationg system installed then you will not see any Edit Button.
- Now a notepad file will oopen, that’s the boot. ini file.
“[boot loader]
timeout=30
default=multi(0)disk(0)rdisk(0)partition(1)WINDOWS
[operating systems]
multi(0)disk(0)rdisk(0)partition(1)WINDOWS=”Windows XP Professional” /fastdetect
multi(0)disk(0)rdisk(0)partition(2)WINNT=”Windows 7” /fastd
- Now suppose if you want to delete Windows XP professional from system, just delete below line.
multi(0)disk(0)rdisk(0)partition(1)WINDOWS=”Windows XP Professional” /fastdetect
- Now you had to remove the remaining files or operating system folder from the drive in which its installed so just navigate to the drive and delete the operating system folder and then restart your system.
CMOS Setup
Here you can setup the basic BIOS features such as date, time, type of floppy etc. Use the arrow keys to move around and press enter to select the required option. You can specify what IDE devices you have such as Hard drive, CD-ROM, ZIP drive etc. The easiest way to setup the IDE devices is by leaving it set to auto. This allows the BIOS to detect the devices automatically so you don’t have to do it manually. At the bottom, it also displays the total memory in your system. See figure 1.
As you can see from figure 3, there are numerous advance settings which you can select if required. For most cases leaving the default setting should be adequate. As you can see the first boot device is set to floppy. This ensures that the floppy disk is read first when the system boots, and therefore can boot from windows boot disk. The second boot device is the Hard disk and third is set to LS120. If you want to boot from a bootable CD then you can set the third boot device to CD/DVD-ROM. See Figure 2.
Here you can setup the contents of the chipset buffers. It is closely related to the hardware and is therefore recommended that you leave the default setting unless you know what you are doing. Having an incorrect setting can make your system unstable. If you know that your SDRAM can handle CAS 2, then making changes can speed up the memory timing. If you have 128MB SDRAM then the maximum amount of memory the AGP card can use is 128MB. See Figure 3
This menu allows you to change the various I/O devices such as IDE controllers, serial ports, parallel port, keyboard etc. You can make changes as necessary. See figure 4.
The power management allows you to setup various power saving features, when the PC is in standby or suspend mode. See figure 5.
This menu allows you to configure your PCI slots. You can assign IRQ’s for various PCI slots. It is recommended that you leave the default settings as it can get a bit complicated messing around with IRQ’s. See figure 6.
This menu displays the current CPU temperature, the fan speeds, voltages etc. You can set the warning temperature which will trigger an alarm if the CPU exceeds the specified temperature. See figure 7.
If you made changes to the BIOS and your system becomes unstable as a result, you can change it back to default. However if you made many changes and don’t know which one is causing the problem, your best bet is to choose the option “Load Fail Safe Mode Defaults” from the BIOS menu. This uses a minimal performance setting, but the system would run in a stable way. From the dialog box Choose “Y” followed by enter to load Fail-Safe Defaults.

Like the Fail-Safe mode above, this option loads the BIOS default settings, but runs the system at optimal performance. From the dialog box Choose “Y” followed by enter to load Optimized Defaults.

To password protect your BIOS you can specify a password. Make sure you don’t forget the password or you can not access the BIOS. The only way you can access the BIOS is by resetting it using the reset jumper on the motherboard.

To save any changes you made to the BIOS you must choose this option. From the dialog box choose “Y”.

If you don’t want to save changes made to the BIOS, choose “N” from the dialog box.

How to Format & Reinstall Win Xp
How to Format & Reinstall Win Xp
First Step : CPU Start or press F1 Key Or Del Key and This figure Shown.
All versions of Windows XP CD are bootable. In order to boot from CD/DVD-ROM you need to set the boot sequence. Look for the boot sequence under your BIOS setup and make sure that the first boot device is set to CD/DVD-ROM. You can then perform the following steps to install Windows XP:
Change Boot Sequence exm. First Boot device CD/Dvd Room
And Save & exit
Step 1 – Restart your PC and place your Windows XP CD in your CD/DVD-ROM drive. Your PC should automatically detect the CD and you will get a message saying “Press any key to boot from CD”. Soon as computer starts booting from the CD your will get the following screen:
Press any key from keyboard
Step 2 – At this stage it will ask you to press F6 if you want to install a third party Raid or SCSI driver. If you are using a an IDE Hard Drive then you do not need to press F6. If you are using a SCSI or SATA Hard drive then you must press F6 otherwise Windows will not detect your Hard Drive during the installation. Please make sure you have the Raid drivers on a floppy disk. Normally the drivers are supplied on a CD which you can copy to a floppy disk ready to be installed. If you are not sure how to do this then please read your motherboard manuals for more information.
Step 3 – Press S to Specify that you want to install additional device.
Step 4 – Press Enter to Continue .
Step 5 – You will be presented with the End User Licensing Agreement. Press F8 to accept and continue
Step 6 – This step is very important. Here we will create the partition where Windows will be installed. If you have a brand new unformatted drive you will get a screen similar to below. In our case the drive size is 8190MB. We can choose to install Windows in this drive without creating a partition, hence use the entire size of the drive. If you wish to do this you can just press enter and Windows will automatically partition and format the drive as one large drive.
However for this demonstration I will create two partition. The first partition will be 4000MB (C: drive) and second partition would be 4000MB (D: drive). By creating two partition we can have one which stores Windows and Applications and the other which stores our data. So in the future if anything goes wrong with our Windows install such as virus or spyware we can re-install Windows on C: drive and our data on D: drive will not be touched. Please note you can choose whatever size partition your like. For example if you have 500GB hard drive you can have two partition of 250GB each.
Press C to create a partition.
Step 7 – Windows will show the total size of the hard drive and ask you how much you want to allocate for the partition you are about to create. I will choose 4000MB. You will then get the screen below. Notice it shows C: Partition 1 followed by the size 4000 MB. This indicates the partition has been created. We still have an unpartitioned space of 4182MB. Next highlight the unpartitioned space by pressing down the arrow key. Then press C to create another partition. You will see the total space available for the new partition. Just choose all the space left over, in our case 4182MB.
Step 8 – Now you will see both partition listed. Partition 1 (C: Drive) 4000MB and Partition 2 (D: Drive) 4182MB. You will also have 8MB of unpartitioned space. Don’t worry about that. Just leave it how its is. Windows normally has some unpartitioned space. You might wonder what happened to E: drive. Windows has automatically allocated E: drive to CD/DVD-ROM.
Select Partition 1 (C: Drive) and press Enter.
Step 9 – Choose format the partition using NTFS file system.This is the recommended file system. If the hard drive has been formatted before then you can choose quick NTFS format. We chose NTFS because it offers many security features, supports larger drive size, and bigger size files.
Windows will now start formatting drive C: and start copying setup files as shown on the two images below :
Copying File
Restart CPU and Booting
Step 10 – After the setup has completed copying the files the computer will restart. Leave the XP CD in the drive but this time DO NOT press any key when the message “Press any key to boot from CD” is displayed. In few seconds setup will continue. Windows XP Setup wizard will guide you through the setup process of gathering information about your computer.
Step 11 – Choose your region and language.
Click Next
Step 12 – Type in your name and organization.
Step 13. Enter your product key.
Step 14 – Name the computer, and enter an Administrator password. Don’t forget to write down your Administrator password.
Step 15 – Enter the correct date, time and choose your time zone.
Step 16 – For the network setting choose typical and press next.
Step 17 – Choose workgroup or domain name.(Exmp. NME) If you are not a member of a domain then leave the default settings and press next. Windows will restart again and adjust the display.
Press OK
Step 18 – Finally Windows will start and present you with a Welcome screen. Click next to continue.
Choose ‘help protect my PC by turning on automatic updates now’ and press next.
Step 19 – Will this computer connect to the internet directly, or through a network? If you are connected to a router or LAN then choose: ‘Yes, this computer will connect through a local area network or home network’. If you have dial up modem choose: ‘No, this computer will connect directly to the internet’. Then click Next.
Ready to activate Windows? Choose yes if you wish to active Windows over the internet now. Choose no if you want to activate Windows at a later stage.
Step 20 – You will get a Thank you screen to confirm setup is complete. Click finish.
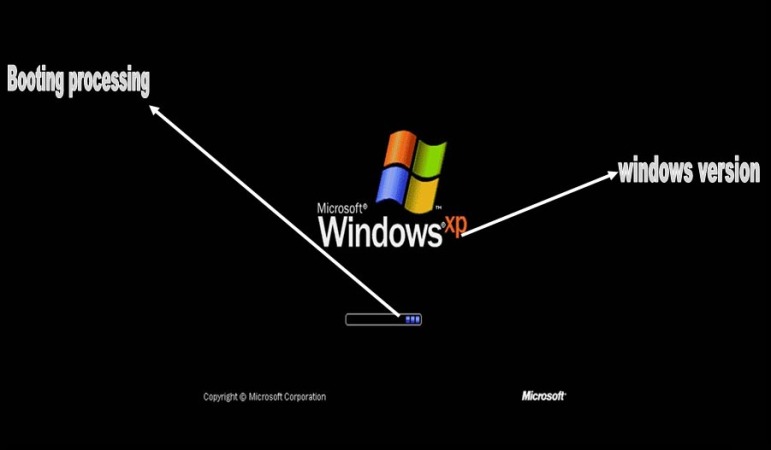
Welcome Window
Contact Us
Address: Dharmawoti-1 Bagdula, Pyuthan (Nepal)
 Ph.: +977-086460029, +9779847897410
 Fax: +977-086460029
 E-mail: nmeiit@yahoo.com
 Web Site: https://nmeiit.wordpress.com/
फेसबुकमा टाइमलाइन कसरी हटाउने ?
तपाई हामी कत्तिलाई टाइमलाइन मन नपर्न सक्छ । मन नपरेपछि कैयनलाई पुरानो (normal) अवस्थामा परिवर्तन गर्ने तरिका थाहा नहुन सक्छ भनेर हामीले यो जानकारी तयार गरेका छौ ।
फेसबुकमा टाइमलाइन हटाउने तरिका :
यदि तपाई फेसबुक टाइमलाइनको कारण दिक्क हुनुभएको छ भने एउटा उपाय टाइमलाइन प्लग इन ले दिएको छ । यसले विभिन्न ब्राउजरमा प्लगइन अनि एक्सटेन्सन डाउनलोड गर्ने सुविधा दिएको छ । हाललाई फायरफक्स प्लग इन अनि गुगल क्रोम एक्सटेन्सनमा राम्ररी काम गरेको छ । एक्sप्लोरर र सफारीको काममा पनि प्रगति हुँदै गरेको देखिन्छ ।
यदि तपाईले फायरफक्स चलाउनुहुन्छ भने फायरफक्स आइकनमा क्लिक गर्नुहोला अनि गुगल क्रोम चलाउनुहुन्छ भने गुगल क्रोमको एक्सटेन्सनमा क्लिक गर्नुहोला । अक्सेप्ट गर्नुहोस् अनि इन्स्टल गर्नुहोस् ।
टाइमलाइन प्लग इन पानामा प्रवेश गर्न तलको अड्रेस लाइ कापी गरेर आफ्नो ब्रोजर मा पेस्ट गर्नुश अनि + हटाएर लाइ इन्टर गर्नुहोस
http://www.timeline+remove.com
© Copyright NME Service’s. All Rights Reserved 2011


